Monday, December 2, 2013

ThingLink is a Great Tool for All Classrooms

I've written about ThingLink before.  ThingLink is a great tool that allows you to take any photo and then tag the photo with links to videos, images, webpages, or text.  This is a great tool for students to curate content about a topic, or for a teacher to present content.  You can use it on any device with internet access and they have an iOS app.  (An Android App is in the works.)

Here is sample made by one of my AVID students.  It was part of a college research project:  


Right now, ThingLink is having a special for teachers.  They are really working on supporting teachers, and have a lot in the works for 2014.  Right now, they are offering all teachers at schools and universities free access to ThingLink Premium for 2014 (worth $250).  To get this great deal all you have to do is sign up for a ThingLink Teacher Account using this link by the end of December.  Or, if you already have an account, respond to their offer email.

ThingLink Premium allows you to

  • use custom icons
  • set up groups for classrooms
  • view image slide shows (coming soon)
  • view image analytics
  • and more
Don't miss out!  Sign up for a ThingLink Educator Account today!


Saturday, November 30, 2013

I'm going to the Google Teacher Academy!

Last month I found out that I was accepted to participate in the Google Teacher Academy in Stockholm, Sweden in December.  

I have started a separate blog to chronicle my experiences in becoming a Google Certified Teacher.

Please check it out. :)

Here's a link to my GTASWE Blog.

Tuesday, November 19, 2013

Using iMovie iPad Trailers to Demonstrate Student Learning

When I was in high school, doing video projects were always such a big production.  They took lots of time, required lots of different equipment, and most projects required students to meet and work with their groups after school and off campus.  And the videos were poorly edited, if at all.

With advances in technology, most students now have amazing video cameras and editing software on their cell phones.  With the iMovie iOS app, students can quickly and easily make high quality videos to show what they know.  They can film people acting things out or can find images online to include into their videos.  

iMovie is easy to use, and when I first introduce it to my classes, they can create a high quality video in about five 50 minute class periods.  After learning how to use iMovie, they can do this in a much shorter amount of time.

Here is a set of instructions that I have written up for my students to use.  It includes instructions on how to storyboard their project (with templates), directions on how to find creative commons images, create the video, include a voice over, and properly cite their sources, including adding credits.  Feel free to make a copy of it and share it with your students.


*I created this slideshow before iMovie updated with iOS 7.  There are a few new features in the app, but everything is pretty much the same.  Soon, I will update the presentation to match the new iMovie.

Monday, November 11, 2013

Tech Tools to Help Improve Student Engagement

Last week at our All-Staff meeting, we heard the results of the DAIT walkthrough.  Most observed classrooms had engaging teachers, who were talking at their students, acting as a sage on the stage.  However, the students were just passively taking in the information.  They may have been really interested in the content, but we may not be reaching ALL of our students.

Our administration encouraged our staff to add some more active engagement strategies to our lessons.  Here are a few tech tools that can help us easily incorporate more of the Direct Interactive Instruction (DII) strategies into our courses.
  • Equity Cards
    • Teachers Pick - iOS app
      • you can import in your class lists to make "popsicle sticks" for each of your students.
      • call on student's randomly, or just choose the next student.
    • Stick Pick - iOS app
      • this app allows you to add in questions prompts for each student based on ELL levels or Bloom's 
      • you can't import student lists, you have to type in each student individually
  • Clickers & Exit Tickets
    • Plickers - iOS or Android app
      • students hold up cards based on multiple choice or true false questions
      • the teacher is the only person who needs a mobile device
    • Poll Everywhere - texting or internet
      • Sign up for K-12 Basic Acct for free
      • 40 responses per poll.  (So you would need to set up the poll separately for each class, or clear them between class periods.)
      • Integrates into Powerpoint
      • Multiple Choice or Short Answer
    • Socrative - iOS, Android, or Internet
      • You can set up questions ahead of time, or ask questions on the fly
      • Export the answers at the end of the poll
      • Multiple Choice or Short Answer
      • Games 
      • Easy to Use
      • Free
    • Infuse Learning - internet based
      • Similar to Socrative, but students can also draw answers
  • Students Voice
    • Google Voice
      • Students can call your google voice number to leave audio responses to share what they have learned
    • AudibooiOS App or internet
      • Students can create 2 minute podcasts to share what they have learned
  • Students Rate Their Own Understanding
    • Geddit - internet based
      • Allow students to self-evaluate their learning as you are teaching
      • Check for understanding throughout your lesson


Tuesday, November 5, 2013

Using The Differentiator to Write Objectives

Two weeks ago I was able to attend the Fall CUE conference. It was a great experience where I presented, met twitter friends face to face, and learned about new resources.  I also received an email letting me know I was selected to the next Google Teacher Academy in Stockholm!!!!

I plan to write about these two days in more detail soon, but today, I am going to share a tool that I learned about from Robert Fishtrom, my district's Director of Instructional Technology, who was at CUE as well.  (I'm not sure which workshop he was at when he learned about it.)

Background - Writing Objectives
For the past few years, our district has been working on writing and using measurable objectives daily with our students.  We have to post them on the board or on the SMART Board for students to see, and refer back to them throughout the class period.  The objectives must include the what, why, and how.  

  • What:  what we are learning based on the language of the standards
  • Why:  why we are learning it - basically, how it relates to other concepts or the world
  • How: how the objective will be measured, what outcome will be be working towards
The format of the objectives have changed through the last few years.  We can now write them in one sentence, and don't have to add in the why.  I have found that by having the objectives, it really helps me plan out my lessons to ensure that students are engaged and practicing higher order thinking skills.  It also provides the students with some guides about what they are expected to learn and accomplish.  However, sometimes it is hard to really word the objectives the way I want.  

The Tech Tool
That's where the Differentiator tool, by Ian Byrd, comes into play.  The Differentiator allows me to write detailed objectives, and it helps me include higher level's of Bloom's in my objectives.  And, it's really fun to use.  :)

Here is an example of an objective I am using tomorrow:

Students will illustrate how the circulatory and respiratory system work together to pick up and deliver materials to all cells in the body using Cornell Notes and create a screencast in groups of two.


I was able to put this together using the Differentiator.  There are 5 tabs for the 5 different parts of the objective:  
  • thinking skill - Bloom's
  • content
  • resources - where the information or content knowledge comes from
  • products - what you want your students to create 
  • groups - will students work individually or in groups
You go through each tab and choose what you want to include in your objective.  You can edit the objective as well.  For example, there was not the choice of making a screencast in the products page, but I changed that to fit my lesson.

I think that this tool will help teachers write good, detailed objectives.  The Differentiator tool also allows you to really think about what level of Bloom's you want students to be at that day.  And, if you want to create differentiated lessons for your students, this will help you write objectives at differing levels.


Monday, October 28, 2013

Search Google Like a Pro

Google is a great tool to find out information and even to find last minute lesson plans.  But do you always find what you are looking for?  Below are some search tips by Anthony Dejolde that will help you narrow down your searches.

by Anthony Dejolde:  Image Source

Do you want to find a quick lesson for the day?  There is no need to reinvent the wheel.  Before creating a brand new lesson, search for one using Google.  To narrow your searches, try searching for file type.  Enter in the search term followed by filetype:ppt to find a powerpoint presentation.
  • Ex:  mitosis filetype:ppt for a powerpoint on mitosis.
  • Other file extensions:
    • word documents:  filetype:doc
    • pdfs:  filetype:pdf
    • SMART Notebook:  filetype:notebook
For more ideas, learn about more search tips and tricks from Google.

Tuesday, October 22, 2013

Easily Switch Between Personal, Work, and Student Accounts on Chrome

Have you ever been frustrated when you have to keep signing in and out of your Gmail, Calendar, or Drive accounts?  Or afraid that a student using your computer will see your personal emails?

There are way to solve these problems if you are using Google Chrome as your Internet Browser. 

Manage your Personal and Work Accounts
Add multiple users to Google Chrome
  1. Click on the three bars on the top right of your screen.
  2. Click on settings.     
  3. Add a new user.
  4. Here, you will add in your other Gmail account (either your home, work, etc.)  You can enter in a name (ex. personal, work, your username, etc.) and choose a picture.
  5. Now, in the right hand corner of your screen, you will see the picture that represents your account.  (It is on the right if you are on a Mac.  If you are on a PC, it is on the left of your screen.)
  6. If you click on it, you can easily switch back and forth between your personal and work Google Accounts.
  7. It will open up a new Chrome window.  Each one is logged in with the separate account.  So you don't need to worry about signing in or out. 
Student Login on Your Computer
Use Incognito Window

  1. In chrome,  press Control + Shift + n (on a PC) or Command + Shift + n (on a Mac)
  2. Now the student can log in to Drive or any other account.  Your saved passwords or accounts will not be seen by the students.
  3. When the window is closed, all accounts that the student logged into are logged out of.
  4. Note:  On a GAFE account, you may not be able to open an Incognito window.  For example, my school seems to have locked that option.  I have to open the Incognito window from my personal Chrome User window.


Sunday, October 13, 2013

Scientific Argumentation - Incorporating CCSS into my Biology Class

One of the CCSS standards for Literacy in History/Social Studies, Science, & Technical Subjects stresses argumentation as a key idea.  "Central to the process of engaging in scientific thought or engineering practices is the notion that what will emerge is backed up by rigorous argument. Writing Standard 1 places argumentation at the heart of the CCSS for science and technology subjects, stressing the importance of logical reasoning, relevant evidence, and credible sources."  -NGSS Appendix M 

I have always wanted my students to be able to better analyze graphs, data, and the outcomes of their labs.  Many times students look at a chart or graph, they have no idea what it means.  They don't really look at all of the provided information or connect it to what we are learning in class.  Students are so used to be spoon fed the information that they need to know, that they don't do have the critical thinking skills that they need to really process information.

With the implementation of CCSS, I now feel that I can justify spending the time to really work on practicing these skills with my students.  

This summer, I purchased the NSTA book Scientific Argumentation in Biology.  This book is written using the NGSS Frameworks and CCSS.  It contains 30 activities to practice writing arguments.  It teaches students how to write claims, back them up with evidence, and provide justification that relates to the data and topics in science.  Some of the activities are based on articles, pictures, graphs, and data tables, and others have students conducting labs and analyzing the results.  It also goes over counterclaims, and using evidence from multiple sources.  Students work in groups and make a chart containing the parts of their argument on a whiteboard.  Students then present their arguments to other groups to get feedback and develop a stronger argument.  I plan on using many of the activities from this book in my class this year.

I led a professional development for teachers in my district in August and shared an activity from this book.  One of the teachers from my school later shared that he used this whiteboarding argumentation process with students to analyze the data that they collected from their labs.  I hadn't thought of using this argumentation strategy with lab conclusions and I was just about to finish my first inquiry lab with my students, so I decided to try it out. 


First, I taught my students how to write an argument which included a claim, backed up with evidence, and then provide justification.  Next, students practiced by creating a whiteboard with their argument  using the "Mystery Footprints" activity.  The next day, they completed the same activity on their whiteboards using their lab data.  They wrote out their arguments and then visited other group's whiteboards to provide feedback and ask questions about other groups arguments.   Students really were able to analyze the data they collected from their lab and came up with much better lab conclusions than in the past. 

Argumentation Whiteboarding Chart Layout
There are many more uses for scientific argumentation than analyzing data and labs.  My class is participating in the KQED Do Now STEM twitter program.  Each month there is a new Science topic, where a question about a current science issue is posed.  There are resources such as readings and videos for students to learn some background information, then they participate in an online conversation through twitter with students across the country.  As students read the provided background information and watched the video clips, I had students write their own arguments.  They used the same format as we used when writing their arguments from their lab data.  Then, when they were ready, they tweeted their arguments.  But they had to be concise, as they only had 140 characters to tweet with.  This helped the students really refine their arguments.

I am very excited about using this strategy in my class for the rest of the year.  It allows students to collaborate, critically  think, and clearly communicate their ideas.  It is making my students better observers and they are starting to make many more connections between what we are learning and real life examples of the content.  I highly recommend the Scientific Argumentation book.  I have even used this process with my AVID students as they analyzed a reading from a history text.  I think this whiteboarding strategy would work for any subject area.


CCSS Writing Standard 1 for Literacy in History/Social Studies, Science, & Technical Subjects 

  • CCSS.ELA-Literacy.WHST.9-10.1 Write arguments focused on discipline-specific content.
    • CCSS.ELA-Literacy.WHST.9-10.1a Introduce precise claim(s), distinguish the claim(s) from alternate or opposing claims, and create an organization that establishes clear relationships among the claim(s), counterclaims, reasons, and evidence.
    • CCSS.ELA-Literacy.WHST.9-10.1b Develop claim(s) and counterclaims fairly, supplying data and evidence for each while pointing out the strengths and limitations of both claim(s) and counterclaims in a discipline-appropriate form and in a manner that anticipates the audience’s knowledge level and concerns.
    • CCSS.ELA-Literacy.WHST.9-10.1c Use words, phrases, and clauses to link the major sections of the text, create cohesion, and clarify the relationships between claim(s) and reasons, between reasons and evidence, and between claim(s) and counterclaims.
    • CCSS.ELA-Literacy.WHST.9-10.1d Establish and maintain a formal style and objective tone while attending to the norms and conventions of the discipline in which they are writing.
    • CCSS.ELA-Literacy.WHST.9-10.1e Provide a concluding statement or section that follows from or supports the argument presented.


Easily Create Unique and Amazing Videos Using Powtoon

Do you need to make a quick and easy video?  Or do you want your students to create a presentation using something other than the Powerpoint?  Powtoon is the perfect solution.  It allows you to create unique videos with fun animations - and best of all, it is easy to use.

There is a free version, but they also have a educator version which allows 30 students to have accounts too.  You get additional features with this upgrade.  (SUHSD teacher - we have free Classroom accounts for you.  Email me for the account info.)

Here is a sample video I have made using Powtoon.

Here is a student sample from an 11th grade English student I found online:

By Eric Chapiewski
Create Commons Attribution License (reuse allowed)


Monday, September 30, 2013

Chrome Extensions, Apps, and Tips to Improve Teacher Productivity

As a teacher, there is never enough time in the day to get everything done.  Google's web browser, Chrome, has a lot of great ways to increase your productivity.

Chrome allows you to add things called extensions and apps which can help you speed up your every day tasks.  And you can set Chrome up so multiple users can use the browser, so that you don't need to sign in/out of everything all of the time.  

Here is a Google Presentation full of my favorite apps, extensions, and tips to make an educator's life a whole lot easier.

Read through it to learn how to capture screen shots, cite your sources, leave voice comments for students, and more.


If you have some of your own favorites that are not listed here, please share in the comments.  I love learning about new extensions and apps.

Monday, September 23, 2013

Creating a Google Custom Search Engine

Have you ever wanted your students to search a topic on the internet, but were afraid of the results that they would get?  Are the hits they get age appropriate or even the right topic? You can create your own custom search engine, where the students can search and only find websites or sources that you want them to find.  

What you need to do first is find all of the sites that you like.  You will then go to Google Custom Search Engine.  


How To

Choose "New Search Engine" and then start copying and pasting your websites into the boxes.  

Change the name of your Custom Search Engine.  (It auto-names it the first website you enter.)


Now you will be able to get the link to send out or an html embed code to add the search bar to your own website.


Here is a sample Custom Search Engine for Science Current Event/News Articles.  This is what it looks like when it is embedded into a website:  


Sunday, September 15, 2013

Increase Parent Communication: Giving Parents Website Contact Cards

I want to really work on making my classroom transparent and giving parents the opportunity to access all class materials and easily contact me.  At open house this year I handed out contact cards to parents.  (I designed them using TechSmith's Snagit, which I LOVE! It is a great tool.  Check it out if you haven't used it.  There is a free trial.  I had the cards printed at Vista Print.)  I also gave one to each student on the first day of school!

On my website, parents can find class calendars, the course syllabus, instructions to download the Google class calendar, directions to sign up for Remind101 texts, and links to grades and assignments.  I made cards that look like my webpage, including important contact info, my Google Voice number, and a QR code of my webpage on the back.

Front

Back


Monday, September 9, 2013

Using Google Voice to Communicate with Students and Parents

I have always preferred to communicate with my students and parents through email.  With email, I can reply at any time and from anywhere.  I can be at home or even out and about, sending emails from my phone.  (I know many teachers hate bringing work home with them, but sometimes it is easier to respond to emails on my own time.)  Phone calls are hard to return because parents may be at work and many times don't answer the call.  And I don't want to call from my own cell phone in the evening.  So I end up having to to play phone tag quite a bit.
Hungarian Telephone Factory 1937 Budapest
Even though I tell parents that email is the best way to get ahold of me, and the quickest way to get a response, many parents still prefer to call me.  In the past, many did not have email accounts.  But even now, when I believe almost everyone has email, many parents still prefer to speak to me when they have questions or concerns about their students. Also, it is a bit tedious to check my school voice mail.  I always forgot how to get into it and many times parents speak too fast when leaving their number, and I can't call them back.


Google Voice


I have been hearing on twitter about teachers using Google Voice the last few months, so I decided to do some research.  I read some blog posts by TJ HoustonBill Price, Lisa Nielsen, and Alice Keeler.  Here is a summary of some ways that Google Voice might be helpful for a teacher.


  • Google Voice allows you to create a new/free phone number.
  • Parents can call my Google Voice number for free using the widget embedded on my webpage.
  • You can connect this Google Voice number to all of your phones - so if some one calls it, all your phones can ring.
  • You can set it up to get emails or texts if you get a message, missed call, or voice mail.
  • You can turn off the ringing, so the phone goes straight to voicemail at any time, and can schedule times when it will ring or not.
  • You can call or text people using your cell phone, but only the Google Voice number shows, not your own personal cell number.
  • Any voicemails that come in can be transcribed.  You will have a record of all received calls.  And if the parent speaks quickly, you can see the transcribed message, and don't have to worry about keeping up to write down their phone number.
  • You have a call log of all incoming and outgoing calls.  You can add notes to the calls so you have a record of communication with parents/students.
  • You can record received calls. 
  • You can have students call in as part of an assignment and can then embed the message on a website if wanted.  Here are some ideas of how students can use it:
    • Students can text in answers instead of using clickers
    • Students can call and leave a message practicing speaking a world language
    • Students can ask questions about material in a flipped lesson

How I will use Google Voice

I have my Google Voice setup so calls will only go through to my cell phone (I didn't set it to ring my home phone) before school, during my prep period, and after school for one hour.  Parents can get ahold of me directly during this time.  If they call during class or in the evening, they will leave a voicemail which will be transcribed and sent to my email.  I can then choose to call them back when I am free, while I am at home, or can wait until school the next day.  But the message will be saved and I can forward it to anyone if needed (it's an mp3 file).  


You can also choose to never actually have your phone ring and have no messages or texts go to your phone either.  Instead, you can install the google voice extension to your chrome browser, and you will get notifications of any calls or messages when you open up chrome.  (If you don't want any of the calls to go to your phone, when setting up Google Voice, you will still need to enter in your cell phone number.  Then change the settings by unclicking the boxes to have calls, texts, or messages sent to your phone.)


I will be using Google Voice to make all calls to parents this year because it will keep an electronic log of calls.  It will replace my notebook that I kept (not always up to date) and I can add notes to each entry in the log about the conversation.


I have also embedded the "call me" widget onto my webpage so parents or students can easily call me, for free.   I have listed my Google Voice number on my class syllabi so parents can easily call me, even if they can't access my webpage.  However, if a teacher didn't want to give out the number, they could just use the widget, and parents could contact them w/o knowing the Google Voice number.


I am excited to try this out this school year.  I will update this post after using it with my class.  If you have any suggestions or ideas, please let me know.

Monday, September 2, 2013

The BEST Way to Assign and Share Google Documents with Students

The best way to organize, assign, and share google documents with students is using the script gClassFolders.

I have been using google docs with my students for years.  Last January we became a Google Apps for Education (GAFE) school and I began to discover google scripts.  Scripts are magic!

In the past, I had had students create their own documents and share them with me.  I gave them a specific way to name/title the documents, but they didn't always follow my instructions.  And many times they would forget to change the sharing rights and I couldn't view their documents.  And I was so bad at organizing my google drive - their files were everywhere.

That is where the magic of scripts come in.  I can send out documents to students that are already name properly, with the student name, class period, and assignment in the title of the document.  I can control the sharing rights and even "embargo" the assignments, by changing student editing rights so they can't change the document after the due dates.  And I can automatically organize the documents into class or student folders.  I can use google search to find them, or go to a spreadsheet for an assignment and click on the link to each student's document.

To do all of this scripting magic, I use gClassFolders to set up the folders for each class and student.  Then to send out the documents/assignments, I use the hub in gClassFolders to run the Doctopus script.  I can assign individual or group assignments and change the share settings for the entire class at one time.

In the following videos I will share how I export my class rosters from Infinite Campus, run the gClassFolders script to set up my class and student folders, and then run the Doctopus script to send out an assignment.  


How to export class rosters from SUHSD's Infinite Campus and auto type in student email addresses:


How to set up and run gClassFolders:


How to send out documents using Doctopus:


*Note (9/3/13):  It looks like you can now create folders in your gClassFolder Teacher folder and they will show up in Doctopus when choosing folders for templates.  When I created this video, that was not an option.)  

This seems like it is a really complicated process, but you only need to set up gClassFolders once - at the beginning of the year.  If students enter or leave your class, you can update your gClassFolder roster and run the script again.  

From that one original roster, you can then run three other scripts; Doctopus (for sending out documents and running the goobric (rubric) script), Autocrat (a mail merge script), and pageMeister (a script that creates a page for each student on a class website).  

The first time I did this, it took less than a half an hour.  Once you get the hang of this, it will be a snap each time you assign students a google document or presentation.  


Pictures of Documents, Folders, etc. After Using the Scripts:


Sites with more script information:


Monday, August 26, 2013

Communicate with Students and Parents Using Remind101


Welcome back to a new school year!  As you are thinking about procedures and resources you will use with your students, you might be thinking of ways that you communicate assignment instructions and/or due dates with your students.  

Remind101 is a online tool that allows teachers (and coaches, admin, advisers  etc.) to send text reminders to students.  It is an easy and safe way to communicate with both your students and parents.

Pros: 
  • Students/parents NEVER see your cell phone number
  • Teachers never see student's numbers
  • Students can subscribe to remind101 and receive texts or emails if they don't have a free texting plan
  • It is safe for teachers and students - messages go out to the entire class at once - you can't message individuals  
  • Soon you will be able to send messages to groups of at least three students - this will be great to communicate assignments with students who missed class
  • You can send links to websites, google forms, images, etc.
  • You can embed a feed of your reminders into your website
  • You can schedule reminders ahead of time from the web or iOS/Android apps
  • The Remind101 developers are friendly, happy to help, and are open to ideas and suggestions.  They respond quickly to comments/questions.
  • When students or parents complain that they didn't  know when assignments are due, (even though you write it on the board, post a calendar online, and announce it to the class) you can let them know that you send out reminder texts as well.  Most parents will sign up during parent meetings.

Cons:
  • Students can't communicate back if they have a question - but they can email you.
  • Some teachers believe that it is too much "handholding" for students to receive these reminders - but I feel that the more open I am with students and parents about assignments, the less I have to deal with unhappy students and parents.

Ideas for Use:
  • teachers send out homework assignments and due dates to students and parents
  • teachers send links to google forms to collect information from students or parents
  • coaches send out practice and game announcements
  • advisers/teachers send out meeting locations and times during field trips
  • admin sending out all clear notices or announcements to staff during fire/evacuation drills
  • librarians send out announcements about library due dates or open/closed hours


Here is a video explanation of how Remind101 works:


Recommendations:
  • Put a copy of the PDF instructions on how to sign up on your webpage.
  • Have students take out their cell phones and sign up in class.
  • At Back to School Night, have parents sign up.
Remind 101 is a great and easy tool to open up communication in your classroom.  They also have a YouTube channel with lots of how to videos if you get stuck.

Monday, August 19, 2013

Lesson Planning Using Google Calendar

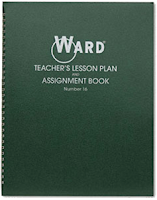
For years I lesson planned in a educational lesson planner book that I purchased at the local teacher supply store.  I didn't like writing my lessons in columns, so I would add in dates to make it look more like a calendar, reading from left to right.  I don't write huge formal plans, just main ideas, activities, and changes from one year to the next.

I decided to go digital after a few years.  I wanted to be able to access my plans from both home and school, without having to carry the book with me.  So I used a calendar template on word, and added in my plans.  I saved the file in my dropbox, so I can access it from both home and school.  I then made a pdf of the plan to post on my website for students and parents.  But every time I updated it, I had to make a new pdf, and update my webpage.

I had tried to find sites online for lesson planning, where you can link the state standards, add in the documents, files, etc.  There are a few out there, and I tried a bunch.  But none were perfect and did exactly what I wanted, so I just went back to using a word document for my plans. 

This year, I am trying something new.  I am using a google calendar for each of my classes. I have even added in links to the assignments (go to the calendar settings and enable the lab "event attachments".  I can then embed the calendar into my webpage.  Now, every change I make in the calendar will automatically update on the webpage.  Since I made my lesson calendar public, students and parents can add the calendar to their own google calendar, and they can even add it to their own mobile devices.  And it will still auto update with any changes I make.  


I think that using a google calendar will make things so much easier for me, and it will benefit my students and parents by having the most up to date information about my class.

I have included some how to's below.


HOW TO ADD YOUR GOOGLE CALENDAR TO YOUR WEBPAGE:  
  1. After creating a separate calendar for your class, click on the arrow on the right side of your calendar name.  
  2. Share this Calendar.                                                    
         
  3. Check the boxes to make it public.  
  4. Click on Calendar Details.                                         
  5. Fill out any details, customize your calendar, then copy the embed code.  This is the html code that you will use to embed your calendar into your website.  
  6. This is what my webpage looks like with the calendar embedded.  


HOW STUDENTS AND PARENTS CAN ADD THIS CALENDAR TO THEIR iPHONE:
  1. When on the calendar settings page, click on the green ICAL button.  Give this URL to your parents/students.  (Accessing it on my webpage using my phone was a little hard - I couldn't copy the link.  So I used a URL shortener, bit.ly, to create a small URL that can be easily typed in.)   
  2. On your iPhone, go to Settings > Mail, Contacts, Calendars.
  3. Choose "Add and Account", then choose "Other", and then "Add Account"
  4. Select "Add Subscribed Calendar"
  5. Type in the link from the green iCAL button into the second screen you see below that says “Subscription” next to “Server”.  Click on “Next” and it will check/verify that the link is correct.  
  6. Open your calendar app.  It will take a few moments for all the calendar items to sync, but you should soon be able to see the calendar items in your app!  You can change the color of the icons for this calendar so they stand out on your phone.  You can also deselect the calendar if you don't want to see it all the time.   

HOW STUDENTS AND PARENTS CAN ADD THIS CALENDAR TO THEIR GOOGLE ACCOUNT ONLINE:
  1. On your computer, click on the + Google Calendar icon on the bottom right of the calendar.
  2. Choose "Yes, Add this Calendar".  
  3. You now will be able to access this calendar on your computer using google calendar.